for Hot-Shoe Flash
Cause and Effect and Goals for Diffusers
"Soft" and "Hard" attributes of lighting are actually perceptual interpretation made by the brain of the viewer based on clues in the photograph. The most significant clues come from how light or dark the shadows are overall, with darker shadows making the object casting them seem higher and sharper-edged than those with lighter ones.
Conventional wisdom is that light modifier size and distance control diffusion and how soft the lighting is. Both are variables affecting the character of the light source but the actual cause and effect of diffusion is a function of how parallel the light rays which hit the object are. To better grasp the actual cause and effect of diffusion we need to consider not just the size and distance of the source, but how many different directions the light hitting the object comes from. The direct sun creates very distinct shadows because its light rays, relative to the subject, are very parallel creating dark shadows with distinct borders. But that same source bouncing light off the sky creates light which wraps around an object 360-degrees creating soft shadow.
Another way to make the light hitting the subject less parallel is to use more than one source. In nature there are always two sources of light: the dominant direction dictated by the position of the sun in the sky and the wrap-around fill created by the sunlight bouncing off the atmosphere. So a logical approach for getting "natural" looking lighting is to mimic the dual-source key/fill character of natural light and its direction relative to the face and objects. I tend to take that for granted because my baseline for learning flash in the early 1970s was using two of them in a fill-over-camera on a bracket and key-off-camera camera to photograph weddings as Monte Zucker's assistant and second-shooter. With two flashes it is possible to control fill and key light independently.
The ability to move the key light creating the highlight pattern independently of the camera allows precise placement of the pattern of the face. The ability to control the tone of the shadows independently of the key light is the Rosetta Stone of lighting. It is the the TONE of the shadows and the EVENNESS of the shadows which provide most of the clues about the shape of objects in a photo. Consider that regardless of the the lighting ratio - 2:1, 3:1, 4:1, etc. - the highlights look the same at its the shadow tone which changes the mood of the lighting and the illusion that it is "hard" or "soft". I've used the dual flash technique for nearly 40 years now, most of them with direct, unmodified flash using the fact the light comes from two independently controlled direction to modify its character.
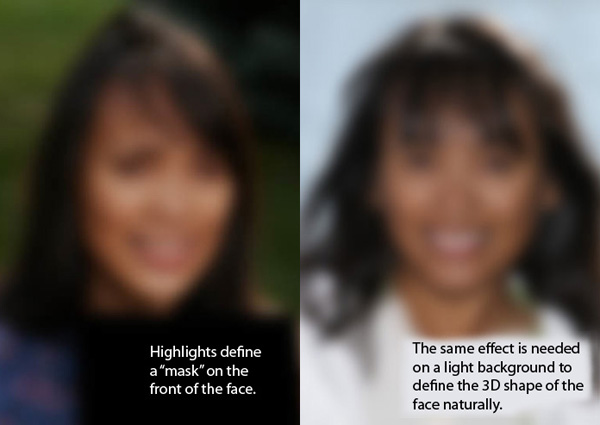
Its also important not to loose sight of the goal for using the light, which is usually to flatter faces and create a realistic illusion of 3D shape in the photograph. The main factor of lighting which flatters a face and make it look normal, per the baseline of viewer expectations, isn't diffusion of the source, its the direction the light comes from relative to the face. Natural lighting and most indoor lighting comes from overhead and our brains are conditioned to seeing objects and faces lit with highlights on the top surfaces and shadows below them. That pattern of contrast defines "natural" and "normal" and explains why a flash built into the camera or placed on the hot shoe produces lighting which looks abnormal and fake.
When light hits a face from overhead at a 45-degree angle from the nose, whichever way it is pointing, it highlights the front of the face in a way which defines the a "mask" pattern which our brains will immediately recognize as a face, even if the photo is blurred:
There are many possible positions for the dominant or "key" light relative the face but the two most flattering combinations are:
Full-Face Angle / Centered "Butterfly" Pattern
A full face pose is symmetrical and the centered lighting strategy, with the key light in-line with camera and the subject's nose complements the symmetrical facial angle with a symmetrical lighting pattern The "key" light while centered is raised over the head of the subject so it strikes he face at a vertical angle of about 45 degrees which results in the desired "natural" pattern of highlights on the top and shadows below. There will be very few shadows visible on the face and the fall off of the the light front to back works to darken the sides of the face creating contrast which tricks the brain into thinking the face is slimmer than it would appear in flat lighting.
Oblique Angle / Short Pattern
This combination of facial angle and lighting tricks the brain into thinking a face is slim and symmetrical by only highlighting the front "mask" and putting the wider side of the face into shadow. It is also more flattering than a full face view because it reveals the shape of the face with the profiled far side. The illusion of symmetry is created by the lighting pattern which when well executed will trace a similar line from eye to chin on the near side with the highlight / shadow border
Technical Hurdles - Scene vs Sensor Range
The photographic process is engineered to produced a perceptually normal reproduction of a scene when both the shadows and highlights are exposed with detail. The dilemma in color photography - both film and digital - is that most scene ranges exceed the range of the recording / output process. With digital cameras the limiting factor is the range of the sensor.
Full-Face Angle / Centered "Butterfly" Pattern
A full face pose is symmetrical and the centered lighting strategy, with the key light in-line with camera and the subject's nose complements the symmetrical facial angle with a symmetrical lighting pattern The "key" light while centered is raised over the head of the subject so it strikes he face at a vertical angle of about 45 degrees which results in the desired "natural" pattern of highlights on the top and shadows below. There will be very few shadows visible on the face and the fall off of the the light front to back works to darken the sides of the face creating contrast which tricks the brain into thinking the face is slimmer than it would appear in flat lighting.
Oblique Angle / Short Pattern
This combination of facial angle and lighting tricks the brain into thinking a face is slim and symmetrical by only highlighting the front "mask" and putting the wider side of the face into shadow. It is also more flattering than a full face view because it reveals the shape of the face with the profiled far side. The illusion of symmetry is created by the lighting pattern which when well executed will trace a similar line from eye to chin on the near side with the highlight / shadow border
Digital cameras will loose shadow detail when exposure is set to retail detail in the highlights. Photographers have learned to work around this limitation by setting exposure based on what is most important in the photo - usually the faces - and allowing some highlight and shadow detail to be lost. The loss of detail is acceptable perceptually up to the point where important content starts to disappear from view. In some cases the losses can be mitigated with cropping, but in situations where it is important to retain detail in white and black clothing at the same time the physical limitations of the camera become a roadblock.
The use of flash to alter the range of the foreground of the scene to fit the sensor is a solution to the dilemma. By independently controlling the shadows via a fill flash and the highlights via a second overlapping "key" flash a photographer can fit the range of the scene to the sensor. Another strategy is to lower the contrast of the scene in the same way an overcast day lowers the contrast of outdoor lighting.
Finding Solutions Which Meet Both Goals
There are many ways to diffuse a hot shoe flash. Some meet the technical goal of matching scene to sensor and putting flattering light on faces better than others. There is no "one-device fits all problems" solution so a photographer needs to learn how the use all possible modification solutions. The simplest is to simply tilt the flash head up and bounce the light off a low white ceiling. This tends to light up the entire room like an overcast day and if used too close to a person downward direction of the light can result in the brow shading the eye sockets. An evenly illuminated room filled with people who have dark eye sockets is a clue ceiling bounce was been used.
Plastic cap devices solve the problem of dark eye sockets by bouncing about 80 percent of the light off the ceiling but allowing about 20 percent to be projected forward. The portion bounced off the ceiling lights up a large area with soft light just as direct flash bounced off the ceiling would.
The shortcomings of ceiling based diffusion are that much of the flash power is wasted illuminating areas which are not in the photo. Also they offer the photographer very little creative control over the direction of the light or the lighting ratio on the subject's face. They are also not effective outdoors where there is no ceiling to diffuse the light.
More consistent results can be obtained by bouncing the flash into a surface which stays attached to the flash. One of the earliest efforts to modify hot shoe flash was to attach a white card to the flash head to bounce some of the light forward, but that method also relied on bounce off the ceiling.
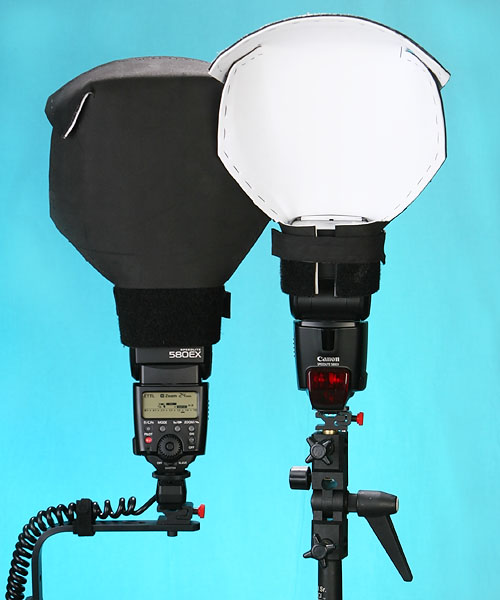
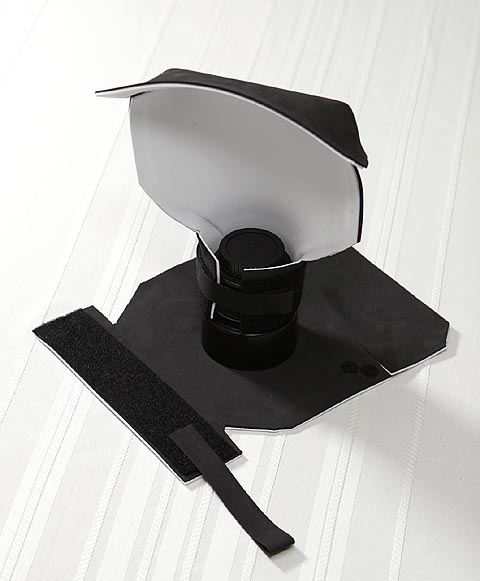
Most of the commercial reflector diffusers on the market at the time were designed to use the ceiling as the bounce surface. Because using two flashes is my normal baseline when I started experimenting with diffusers I didn't need or want bounce off the ceiling. I wanted all the light directed forward without blocking the sensor on the slave flash and developed this diffuser created with mat board to slip over the top of the flashes.
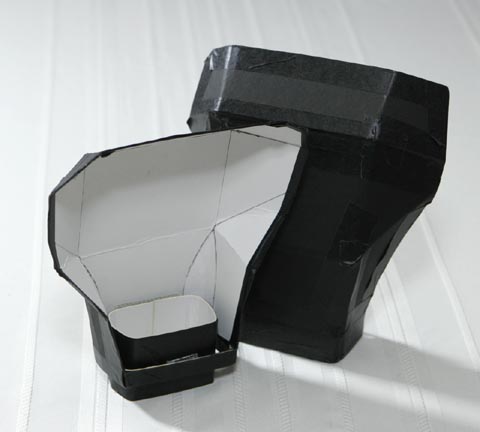
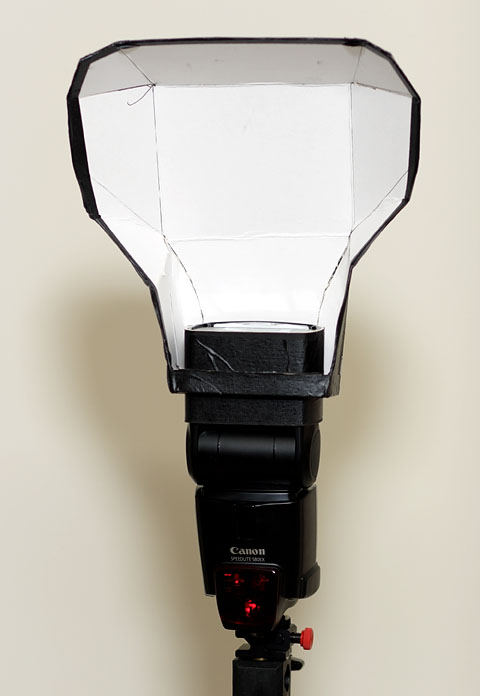
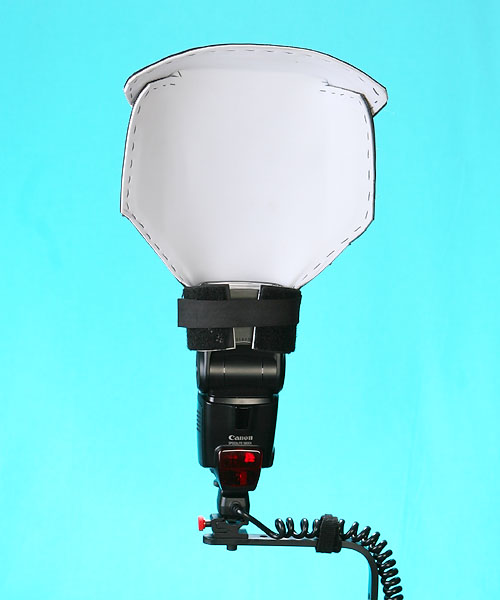
By folding the card into a bowl shape it is possible to capture all the light from the flash and bounce it forward, which wastes less light on non-image areas and is thus more efficient. The photo above shows the pair of reflection-diffusers I created with a couple pieces of white/black mat board, black masking tape and a few staples. Here's how the diffuser looked mounted on my off-camera flash:
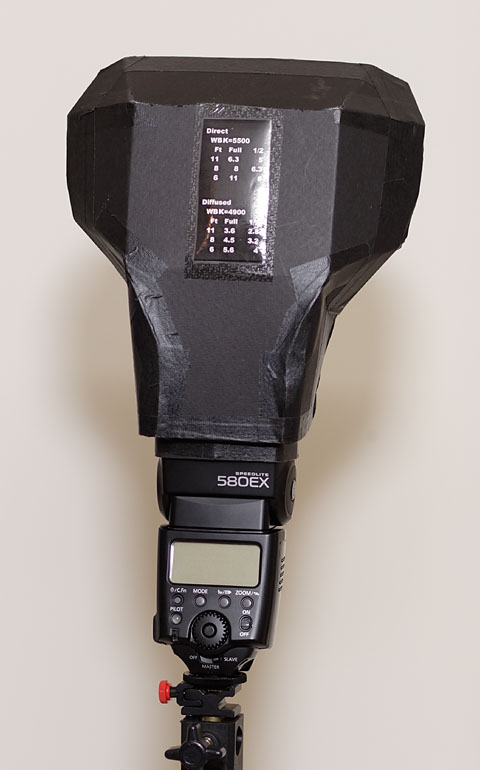
A guy posting on the DPReview lighting forum posting under the name MikeM who had seem my reflector-diffuser created one made of flexible sheets of stuff called "Fun Foam" which can be found at Walmart and craft stores. It had the advantage of being able to be folded flat for storage.
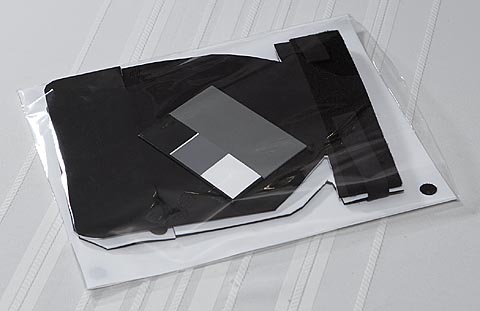
I switched to using the same material adding nylon mesh used for cross-stitch projects (also found at Walmart) as an internal stiffener:

How to Build One
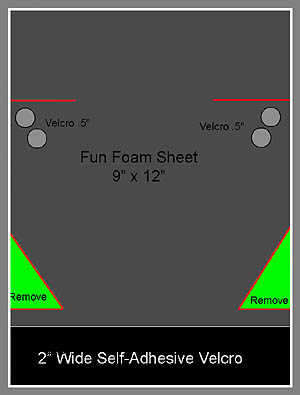
You will find links to templates below. I've found the 9"x12" sheets of "Fun Foam" at Walmart and craft stores. You will need one white sheet and one black sheet. Sometimes the colors are sold separately, but some locations only sell multi-color packs. The color of the back side isn't critical. I use black because in a dark room its less noticeable. Materials aren't really critical. Anything with similar properties will work. In pinch I'm stapled together a few sheets of photo paper.
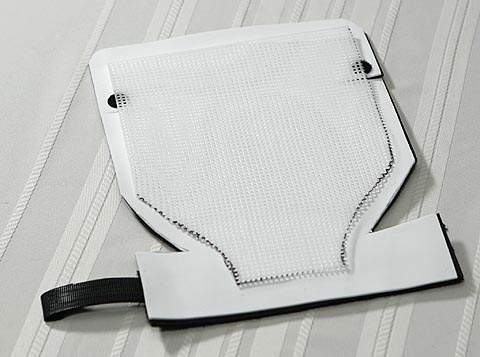
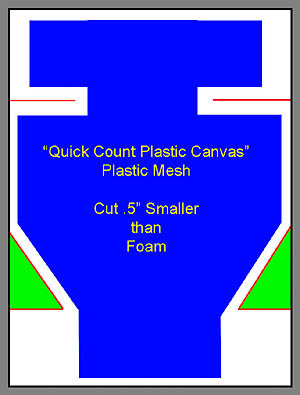
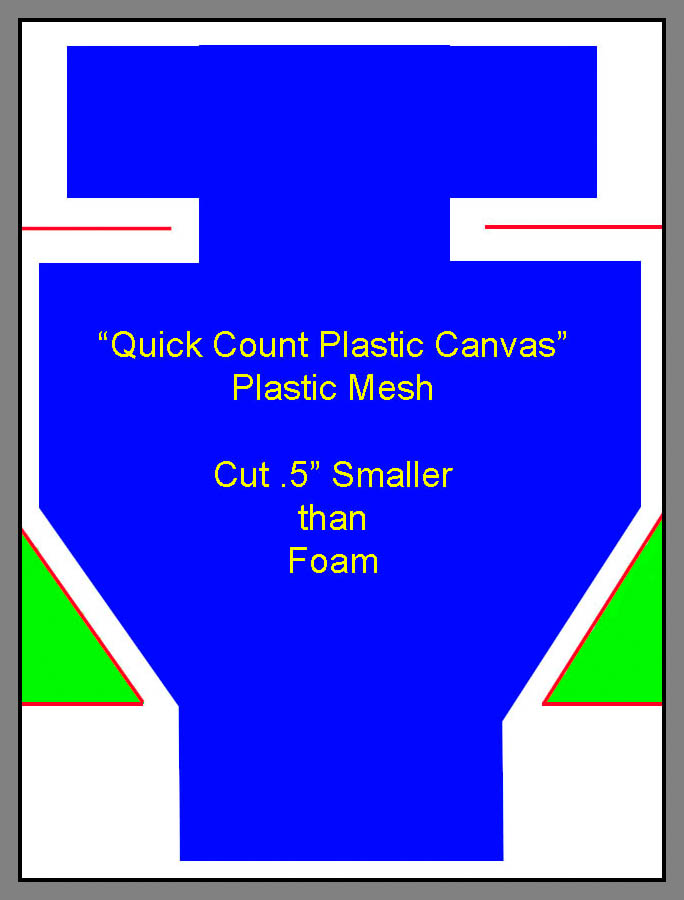
The plastic mesh I used in the middle was found in the sewing section: it is used as the base for cross-stitch projects. It gets cut about 1/2" smaller than the foam and just floats freely in the middle to help keep the diffuser as wide and rounded as possible. Ideally the diffuser should look like a 8" diameter round bowl sitting on top of the flash.
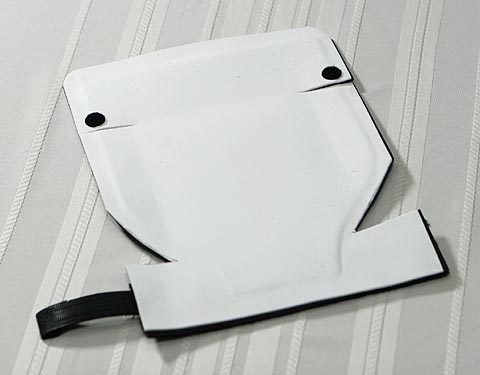
I used 2" wide velcro for the base and the attachment strap and 1/2" round velcro tabs to hold the top flap in place. I bought a whole roll of the 2" velcro because I figured I'd be making few diffusers (no I don't want to sell you one) and find it handy for many other tasks. The round velcro tabs just happened to be on the same rack. Strips or even snaps to hold the flap in place would work.
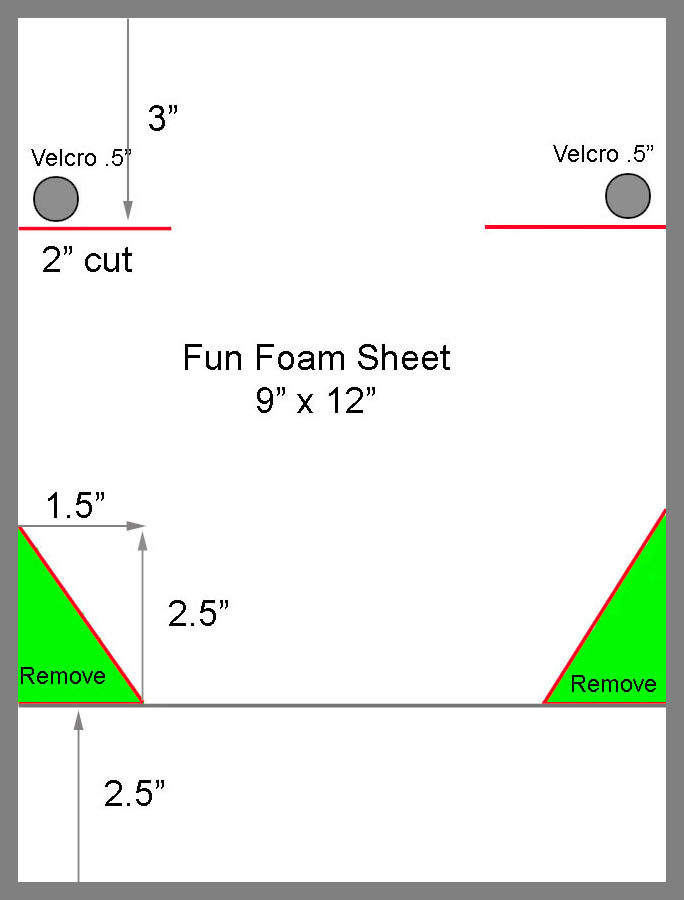
Construction is very simple. Snip out two triangles above the base so it will wrap around the flash head and two slits for the top flap. If you have a round hole punch, punching a hole at the corners of the triangles will help reduce the tendency for the foam to tear there ( a tip submitted by someone who made one ). I've also a small pieces of the loop side of the velcro as reinforcement there.
Cut the mesh about 1/2" smaller as shown in blue on the template. I've tried various methods of assembly such as stitching (what I did for those in the photos) and glue but found using a stapler to be much easier. Glue breaks loose with repeated folding.
Sandwich the mesh between the white and black foam sheets with the black sheet on top and staple it every 3-4" around the edges. Paint the heads of the staples with a black marker to hide them.
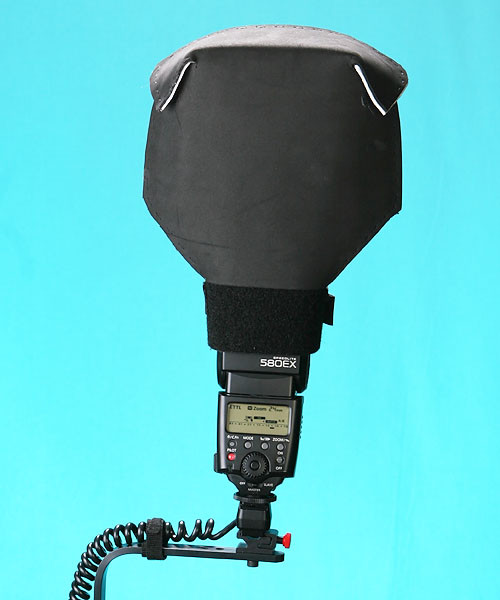
The top flap is held in place by velcro. I used 1/2" round velcro dots for a neater appearance but a small strip would be equally effective. Note on the templates there is a single velcro tab on the white foam sheet inside of the top flap and two on the black sheet outside. The two tabs on the outside allow the top flap to be pulled down flat to bounce all the light forward when using two flashes in a key / fill arrangement or outdoors where there is no ceiling to bounce the light. Indoors where there is a low ceiling I will usually angle the flap up at 45° for some bounced fill when using single flash. The flap can also be left open for even more bounce fill off the ceiling.
To create a strap for attaching the diffuser to the flash just take a strip of the 2" self-adhesive velcro and put a piece of the foam over the front. You'll need a third piece of foam for that. I've found that using red foam from a multi-color pack from the strap allows me to tell subjects "Look at the red bar" which helps to get them looking up in to the light, getting it into the eyes.
How I Use Them
First I strongly recommend the diffuser be used with a flash bracket to raise the flash so the light comes from a more flattering downward direction. If used with just one flash on a bracket the raised centered pattern will create a very flattering "butterfly" style pattern in a full face pose.
Even when the person turns sideways the flash, if used on a bracket, will hide the nose shadow behind the nose and the lighting will remain flattering.
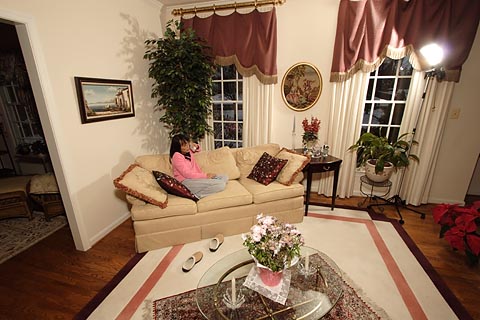
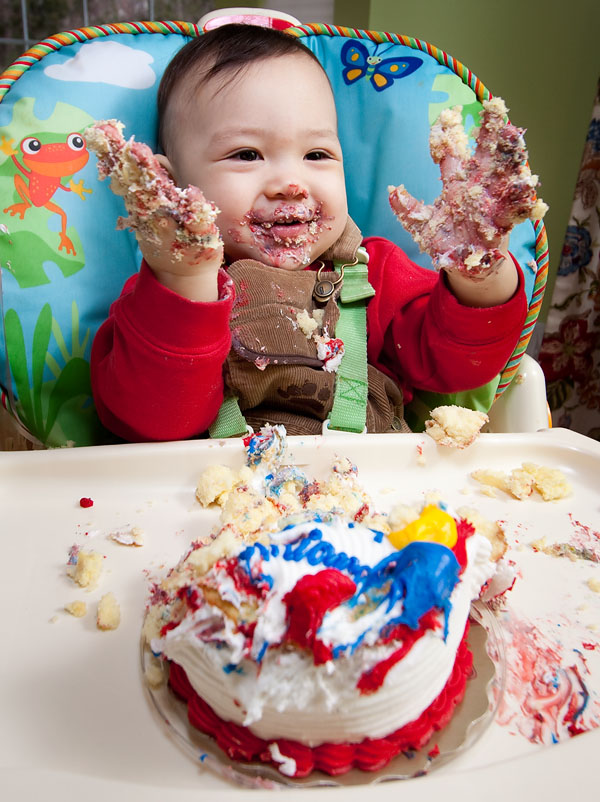
When using a single flash I will often open the top flap completely to bounce light off the ceiling or stand on a chair with the diffuser very close to the ceiling as I did for this shot to get more bounce fill
With a Canon 580ex flash as Master on the bracket it is very easy to switch from single flash to dual flash.
Single
Dual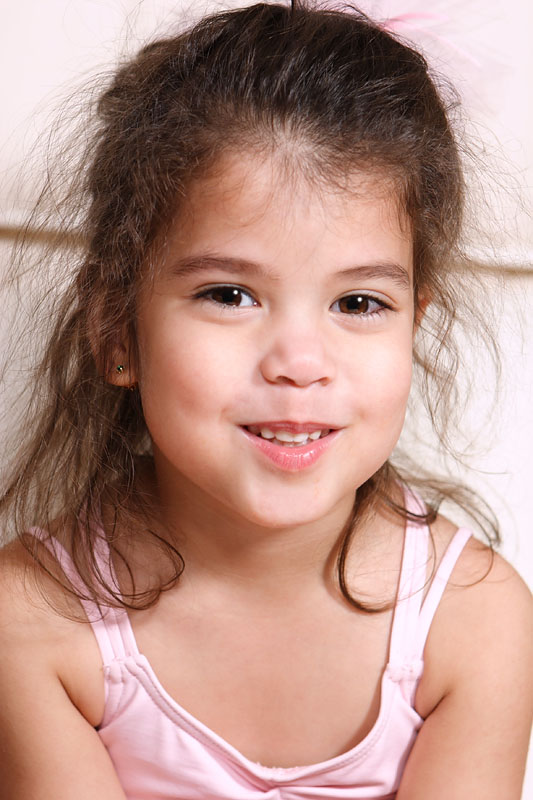
When using two flashes it is possible to precisely place the light on the faces in some candid situations but not in others. If I find a situation where I can predict where the subject will be looking I will wheel my off camera flash which I mount on a modified IV stand around to the far side standing behind the light so I can see where the light will hit until I can see an oblique view of the person's face. I then walk-around to the front of the other oblique side to capture a flattering short-lit view of the person.
A medium shot to show the overall lighting pattern:
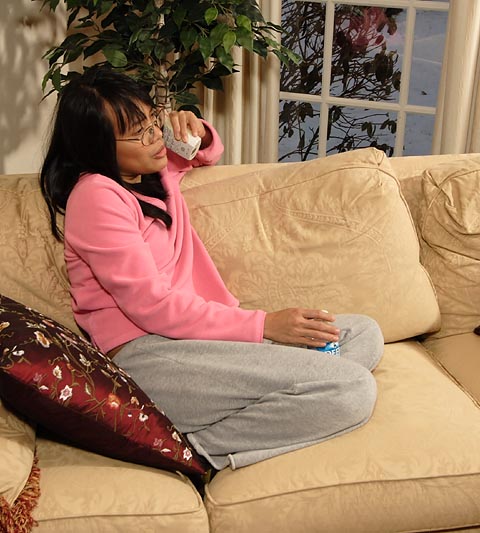
A H&S shot. I switched lenses to the 85mm and moved the light closer and slightly more behind her for this one.

What makes flash lighting unflattering is harsh, poorly placed shadows on the faces and eyes hidden in shadows. So when I can't control or predict which direction a person will be looking in a candid situation I don't put the key light off to the side in front, I wheel it around behind the subjects and use it as rim light. The rim lighting creates an illusion of 3D depth and shape than single flash shots lack. In this type of situation having the flash on a bracket is critical because its the downward direction and lack of distracting shadows which makes the frontal lighting flattering, as in the single flash examples above.
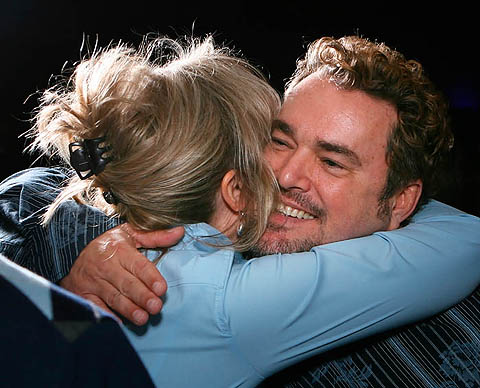
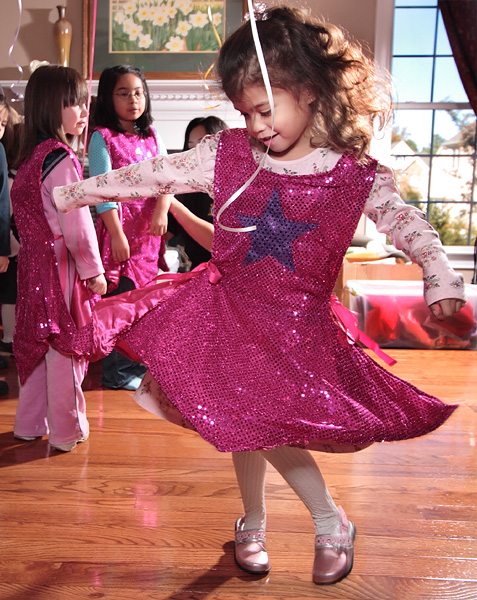
The backlighting strategy is also quite effective for capturing full-length action:
Here's a self-portrait taken with a pair of flashes with diffusers.

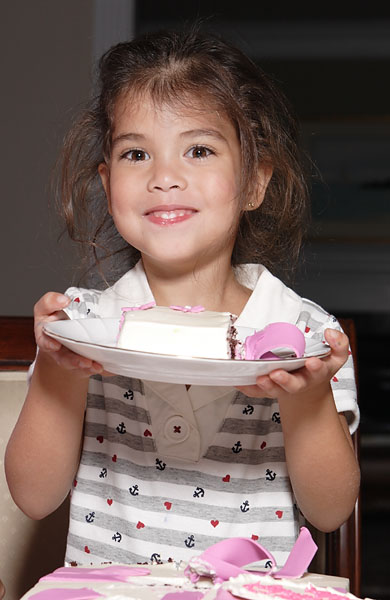
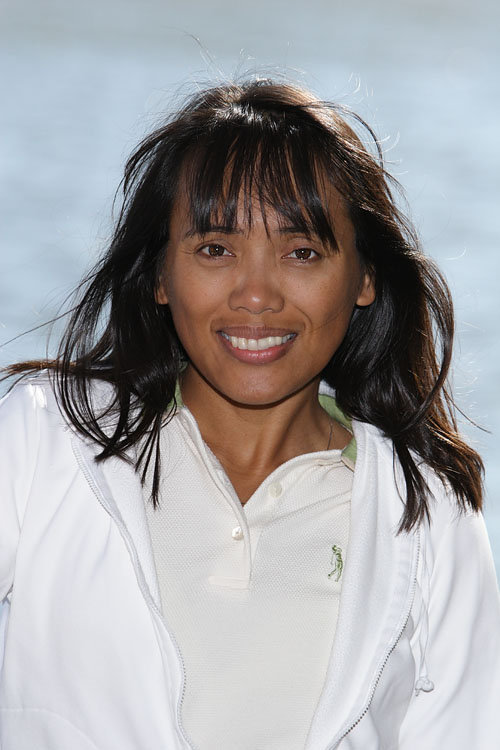
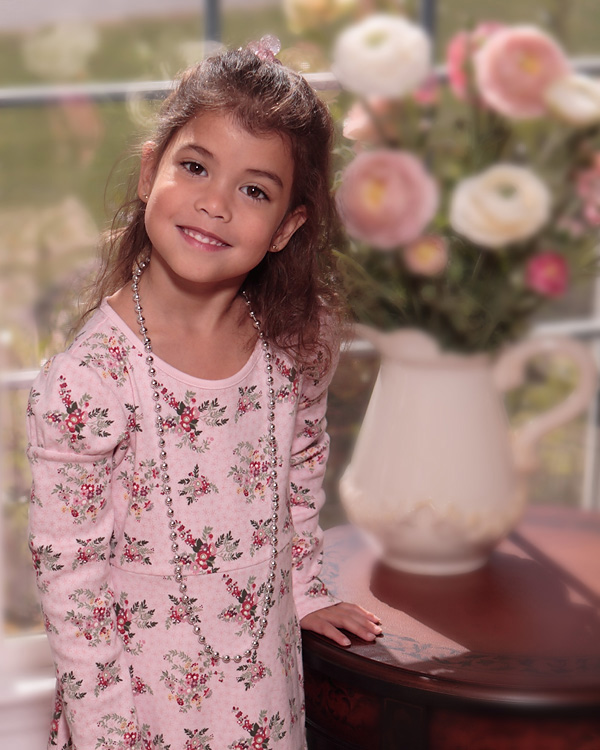
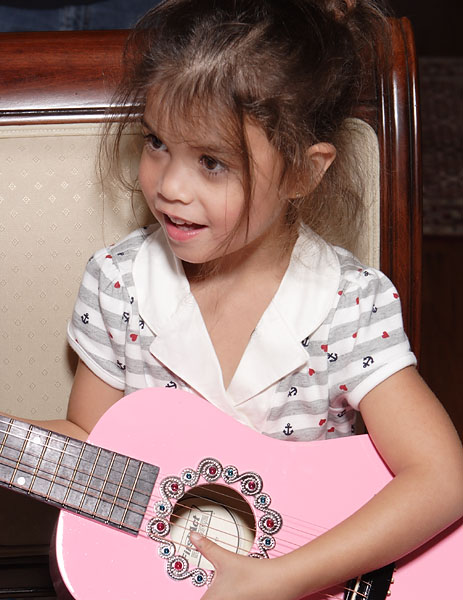
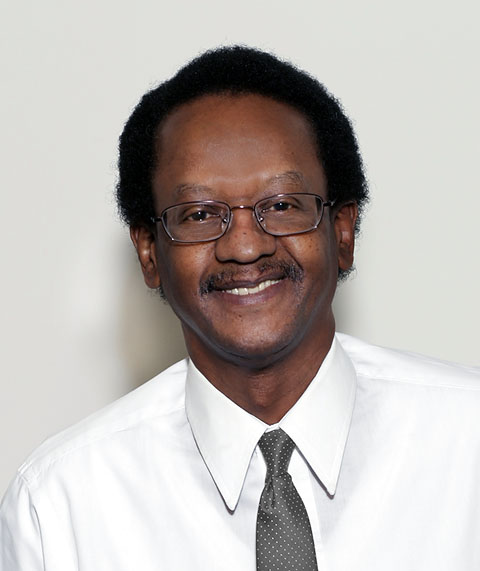
I've taken hundreds of informal portraits with hot shoe flash and diffusers but I don't recommend them as a substitute for studio lighting for serious portrait work. Its a matter of picking the best tool for the job and the tool I feel hot shoe flash is best suited for is location shooting where portability and simplicity of logistics are the primary considerations. I'm fortunate to have both sets of tools. One day when friends stopped by I had my camera on the bracket with the Canon flash and shot the boy below with it, then switched to the studio lights with larger softboxes for the shot of the girl.
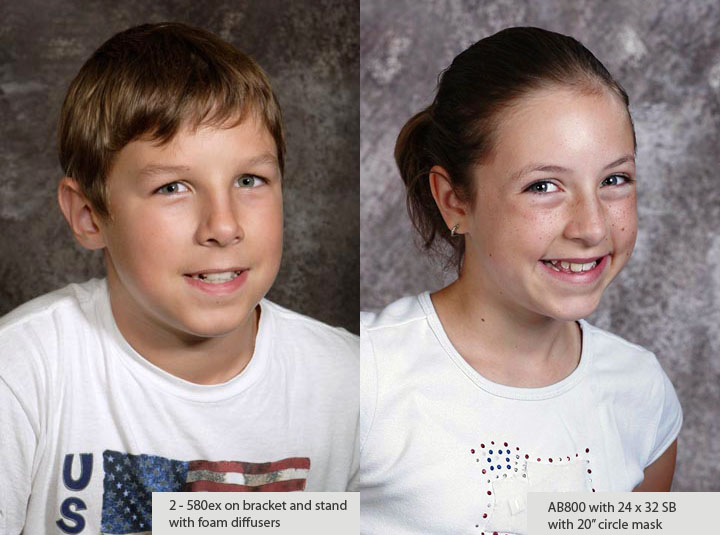
While not on par with the larger studio softboxes the added dimensionality of short lighting and a softening of the light versus the results with a direct flash in the hot shoe is nothing short of remarkable IMHO. It should be noted that the lighting is flattering due more to the control of the direction and placement and the use of dual flash to create the soft overlapping pattern.
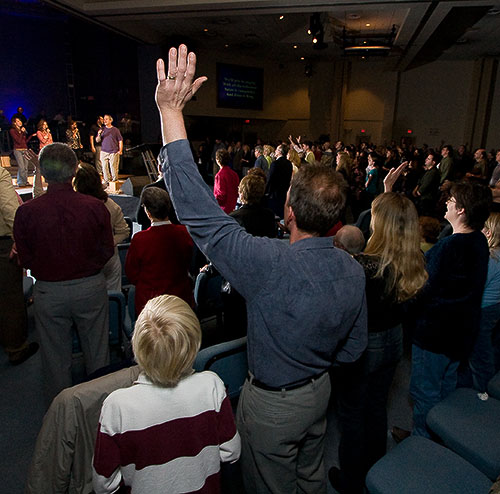
All of the examples above are just quick grab shots, because that's the type of shooting I do most of the time. I don't suggest this diffuser design as the only or best solution, but I having tried many approaches over the years I find it to be the best balance of results and logistics. Often I will use a combination of direct and bounce techniques. For the shot below I zoomed the flash to the maximum setting, opened the top flap of the diffuser and bounced the Master/Fill on the bracket off the ceiling about 15ft in front of me to trigger the slave flash located on the stage just out of view on the left:
For this photo I found that the spectators crowding around blocked the path of the off camera flash so I removed its diffuser, put it behind them and bounced the light off the ceiling over their heads
Personally I prefer the look produced by a small well placed key source and neutral fill, but on occasions where I want more diffusion on my key light I simply replace the diffuser with an umbrella: the bracket I use to hold the flash on the stand is an umbrella bracket.
Try one. You'll like the results it produces. But please remember it is the direction of the light, not how it is diffused is what makes it flattering. Using a diffuser in an attempt to make poorly placed shadows less distracting is like putting a bandage over a bullet wound. The better solution is not to shoot yourself in the foot. If you use this diffuser design I recommend you also use a flash bracket.
Templates showing dimensions
Inside: Click image below for full size template

Outside: Click image below for full size template
Mesh in the middle: Click image below for full size template

Holistic Concepts for Lighting
and Digital Photography
This tutorial is copyrighted by © Charles E. Gardner. It may be reproduced for personal use, and referenced by link, but please to not copy and post it to your site.
You can contact me at: Chuck Gardner
For other tutorials see the Tutorial Table of Contents