Distorting proportions of people and object in a photo can be done with combination of near / far perspective and by controlling the planes of the sensor and the objects.
Many assume the distortion in a wide angle shot is a function of focal length, but it only occurs in WA lenses when they are used very close to the subject. Near / far perspective is actually a function of shooting distance of the camera to the nearest part of the subject and how far the nearest part is from the furthest, not focal length.
In the shot from further away the perspective in the center of the frame is normal at 10mm. When the camera moves closer, within inches from the front hand, there is size distortion front to back relative to the lens.
If you did the same test with a 50mm lens starting at min. focus distance and moving back you'd see the same change in perspective.
When I do a portrait I look at the face from various distances from 7 to 12 feet through a lens and note how the appearance of the face changes. When the camera gets close the nose starts to look bigger relative to the eyes and ears further back, especially in an oblique view. If a person has one eye that is a bit bigger, I'll turn the face to put the smaller eye on the near side then find the shooting distance where the near/far perspective makes the bigger one further back look the same size to the camera.
Once I find the distance which flatters the face the most I then select the focal length with my zoom lenses (24-70mm or 70-200mm) which gives me the desired in-camera crop.
With any lens if the camera is kept perfectly level there will be very little foreshortening, or vertical distortion. For example here's a 10mm shot where the camera was level...

Keeping the camera level keeps the the doorway in the middle square. The distortion on the sides in the shot above due to anastigmatic correction. A simple lens has a spherical focal plane like the retina in an eye. To get a lens to focus on a flat plane like film or a sensor corrective elements are added to change path of the light rays on the edges. That stretches the image in the same way as if you cut a tennis ball in half and tried to nail it flat to a board the same rectangular shape as the sensor. It would be distorted much in the middle but the edges would be stretched, more on the long dimension than the short one just as in a UWA shot.
The anastigmatic stretching is something you need to be aware of when using UWA lenses. It's not really desirable in the interior shot, but using the 10mm was the only way to get the desired field of view with one shot.
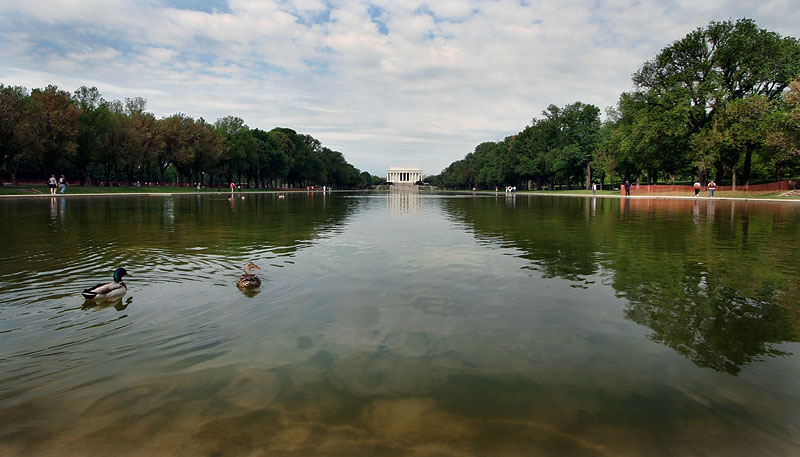
The shot below has the similar stretching on the edges but the content on the edges makes it less noticeable. The camera was low to the ground but kept level and I waited for the ducks to swim far enough away that they were not distorted to the point of looking weird.
In the shots below I intentionally used a low angle and tilted the camera up to create distortion...
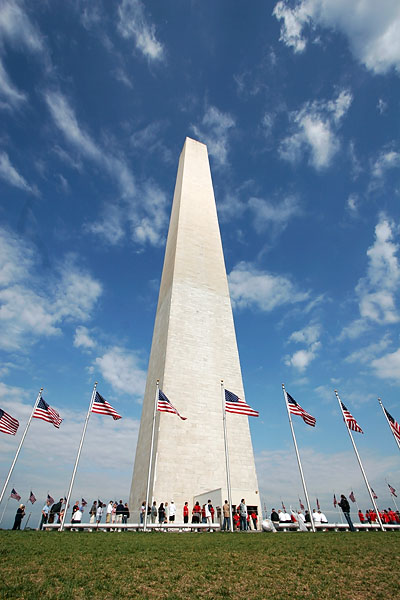
The shot of the monument is similar to how you would use a low angle with the camera pointing up to make a small person look taller by making the head look smaller that the lower part of the body.
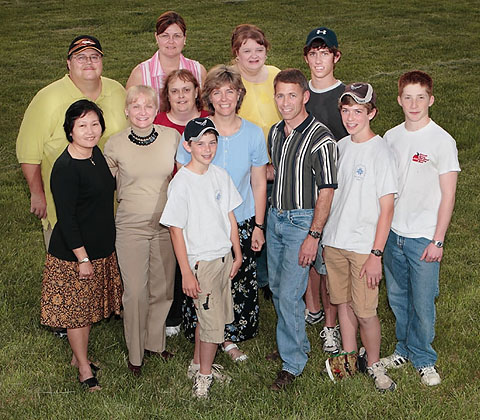
The opposite happens when the camera looks down. The nearer face will look bigger than the body below. That is a technique I routinely use when shooting group shots.
Even when shooting solo subjects I'll have them lean forward at the waist slightly and raise their chins ,then stand on a stool or chair and shoot down...
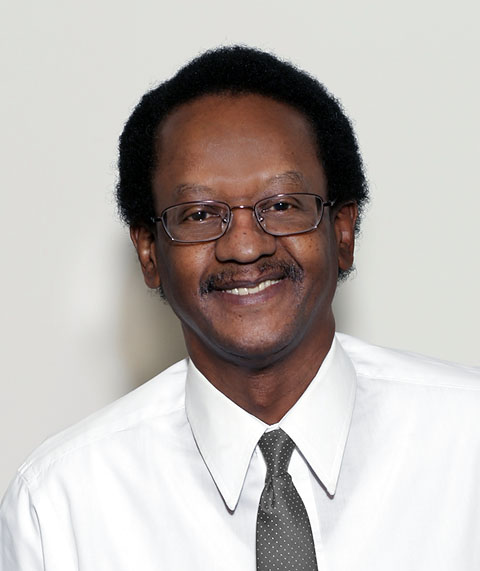
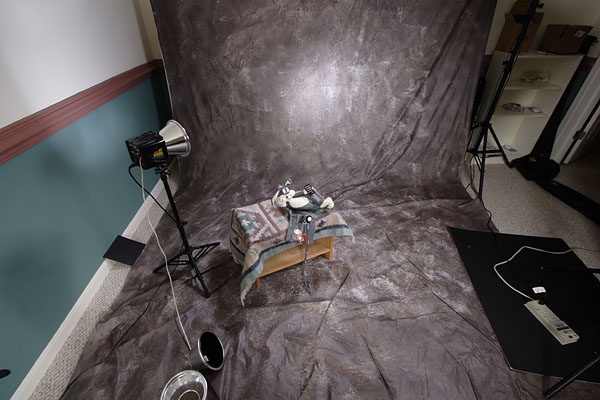
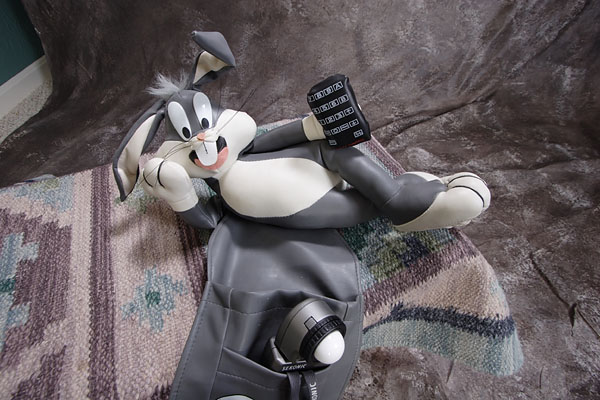
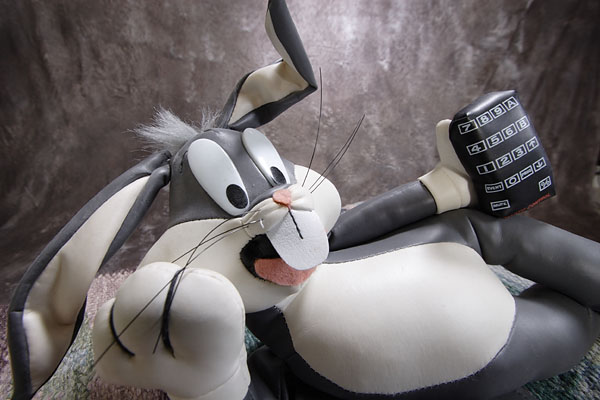
This is sequence I shot for a 2001 class I taught to show how to use window light but it also illustrates this posing / perspective trick:
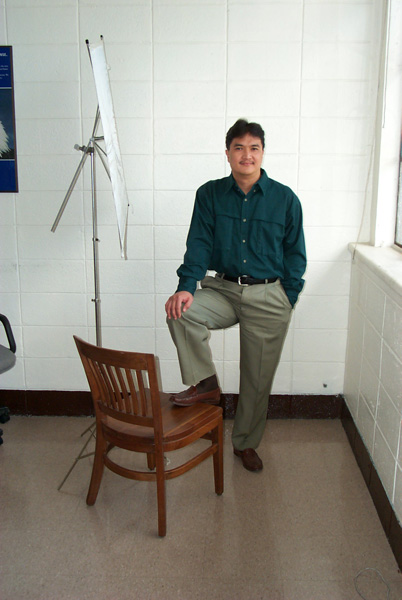
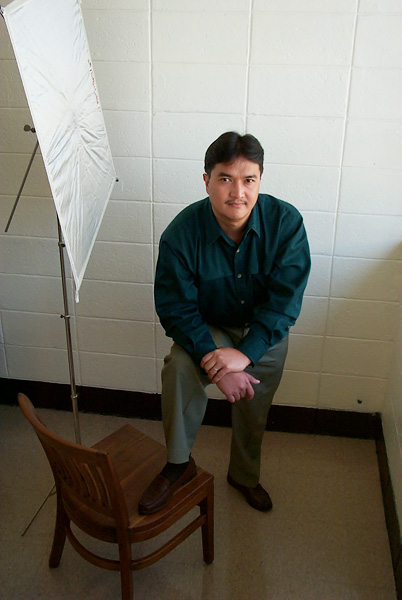
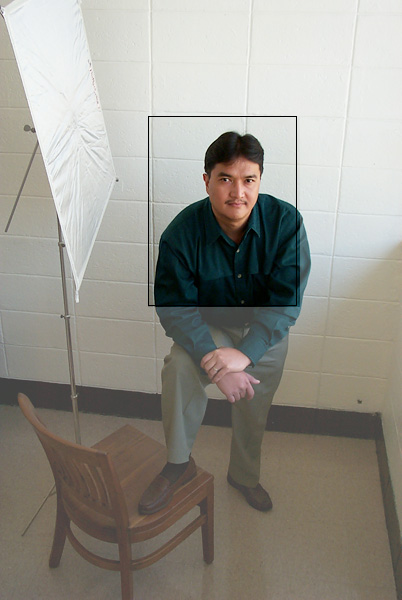
Raising the chin tightens up the loose neck skin. I was standing a chair like the one his foot is on. Shooting down at the same angle he is looking up kept the front plane of the face and camera parallel, as in the ground level view, so there is no distortion of the face. But because the face is closer to the camera than the torso the torso is foreshortened and looks smaller.
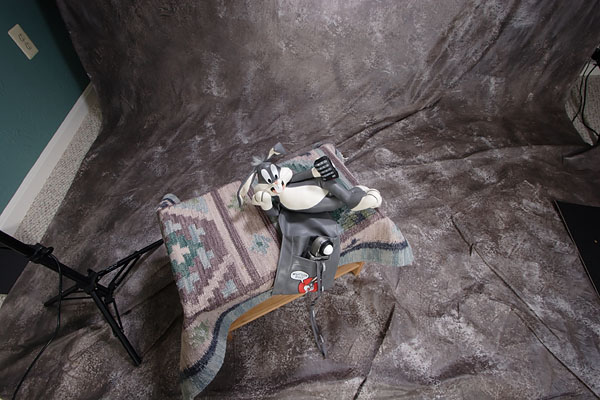
The amount of foreshortening of the body is a function of shooting distance. Note the size difference in his near and far feet. The feet didn't matter because the pose was for a H&S shot. Had I been going for a wide shot I would have moved the back foot closer to the chair and shot from further away, from higher up to keep the angle the same, but have less near/far distortion.
For that shot note how I posed his hands on the knee. That was primarily to control the pose of his arms for the H&S shot, but the combination of him leaning forward with chin over knee and hands on knee also works to keep face, chin and hands on a plane that is the same distance from the camera which keeps closer to correct proportion.
That illustrates an important concept. Whenever you want to avoid distortion the trick is to keep all the body parts of the subject the same distance to the camera: the planes of the body parallel with the sensor.
You'll notice in classic "pin-up" photos from the 40's and 50's that the models are almost always posed sideways to the camera vs. feet first. That kept all the body parts close to the camera. To emphasize the face and bust and make the waist look smaller the photographer would shoot from above model looking up, camera looking down: past the face down into the cleavage with a slimmer than actual waist seen below the bust line. In full length shot a higher camera angle will emphasize the bust line while slimming the waist and hips.
When shooting people from a low angle to avoid shooting up their noses I have them lean forward at the waist to keep the front plane of the face parallel with the camera sensor.
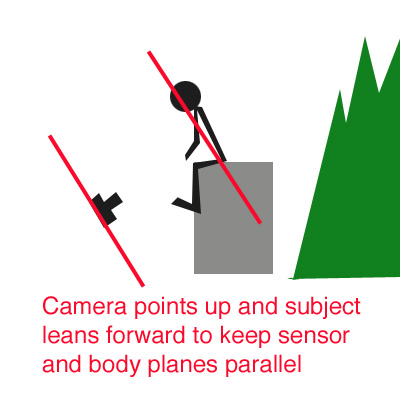
With a standing subject if you shoot low and have them bend at the waist and stick their butt out the face and feet wind up about the same distance and same size, an the hips wind up further away and look smaller in the photo. Again its just a matter of thinking in terms of distance to lens = relative size and manipulating the distances of the body parts...
With a sitting subject to keep all the body parts in their natural proportions you need to have them lean forward at the waist so the chin is over the knees and feet.
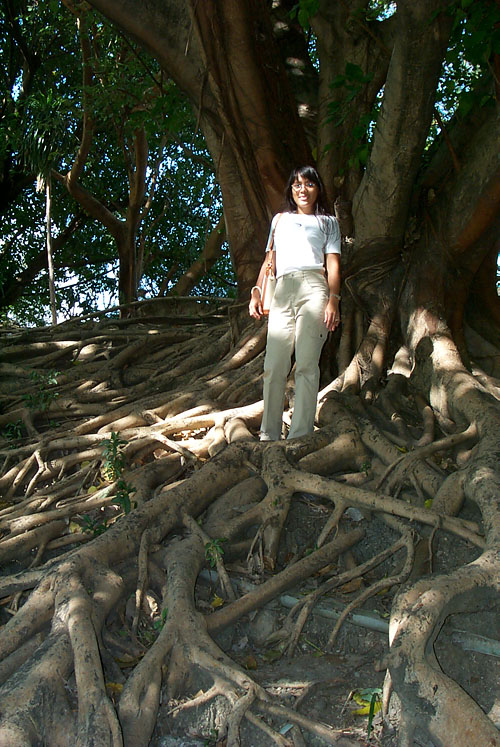
Below is another old shot taken with a 2.1 MP Kodak DC290 in 2001. My wife and I were visiting a tourist park in Manila and I saw a huge Banyon tree on a hill that reminded me of the one in Ansel Adams portrait of Edward Weston. I was forced to shoot up the hill from below...
Here's what the perspective looked like with the camera pointing up and my wife standing upright...
To minimize size distortion between feet and face I had her sit down and bend way forward at about 45° at the waist until her chin was over her knees. Here's how the camera recorded it...
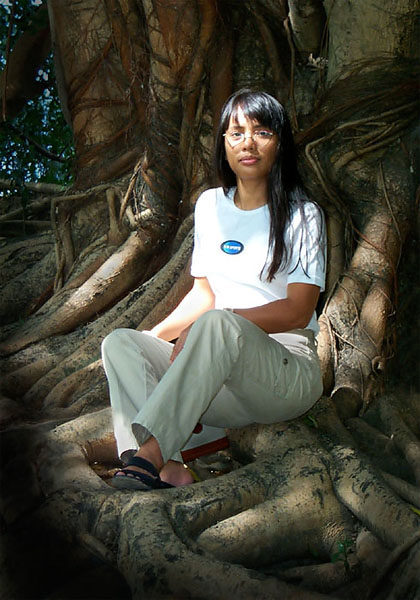
To the camera it looks like she is sitting bolt upright because the plane of her upper body is parallel with the camera sensor. Feet, face and knees are similar in size with minimal distortion because the pose also kept them all a similar distance to the camera. The distance is similar to the wide shot, I just zoomed the 3x zoom on the P&S to the max to adjust the in camera crop.
Once you grasp the cause and effect of shooting distance and keeping the subject and sensor planes you will be able to create distortion or avoid as need to meet your creative goals for a shot.
Holistic Concepts for Lighting
and Digital Photography
This tutorial is copyrighted by © Charles E. Gardner.
It may be reproduced for personal use, and referenced by link, but please to not copy and post it to your site.
You can contact me at: Chuck Gardner
For other tutorials see the Tutorial Table of Contents