I received an e-mail from a furniture maker asking for advice lighting the rocking chairs he created ton a white background, required by a publication, with only two lights. I did this demo in about 30 min using a table I had handy. Its not a definitive tutorial on shooting furniture more like a minimalist approach.
The technique needed for photographing any smooth reflective object differs from those used for faces or matte surface objects. To create a natural looking illusion of 3D in a photograph it is necessary to light objects so highlights are placed on areas which should be perceived as higher and closer and darker tones placed in areas which should be perceived as lower or further back. The reason objects seem more natural when illuminated that way is because we are conditioned to seeing 3D objects illuminated from above with that pattern created on them by the light.
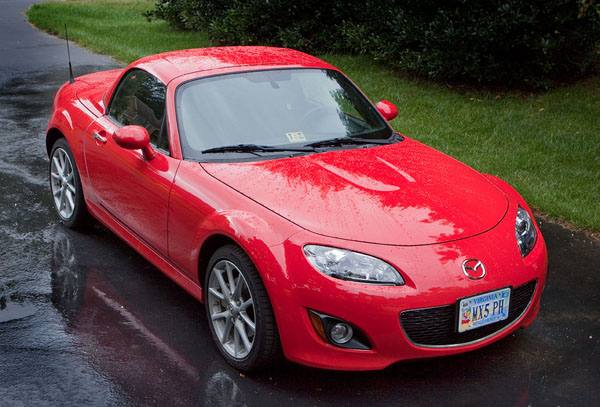
With reflective objects the highlights are the reflection of the light sources and the strategy is one of lighting the area surrounding the object rather than aiming the lights directly at the objects. The ideal conceptual model for this is an overcast day outdoors. Photographs of cars are often taken outdoors on overcast days to create large uniform reflections on the flat top surfaces. The reflection of the dark pavement around the car, accentuated by wetting it and making it darker, creates the illusion of "shadows".
The technique needed for furniture or any highly reflective object is similar: find a way to surround the object with a "tent" of uniform light, then selectively block the reflections from the surrounding light walls to create normal tone and the illusion of 3D shape and depth.
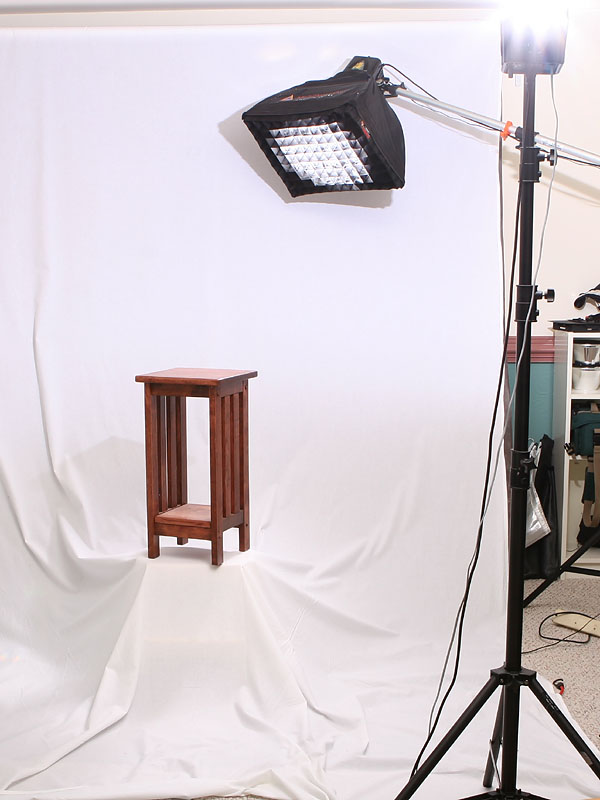
In the case of the furniture maker the first challenge was creating a uniform white surround with only two lights. But starting with the conceptual model of an overcast day and working the problem I arrived at a workable solution: using a bare bulb flash to fill a small white room with uniform light, then using a second source directly, behind the object, to enhance the illusion of shape. Here is a photo of the set-up I used:
To minimize the shadows falling around the legs of the table I put it on a draped platform of the same size. The bare bulb flash, an Alien Bee AB800, filled my small studio space with light and also created a directional point-light source on the front of the table. The light in the background is another AB 800 equipped with a Photoflex 16 x22 softbox, 40-degree grid, and cirle mask. That is what I normally use as my "hair" light.
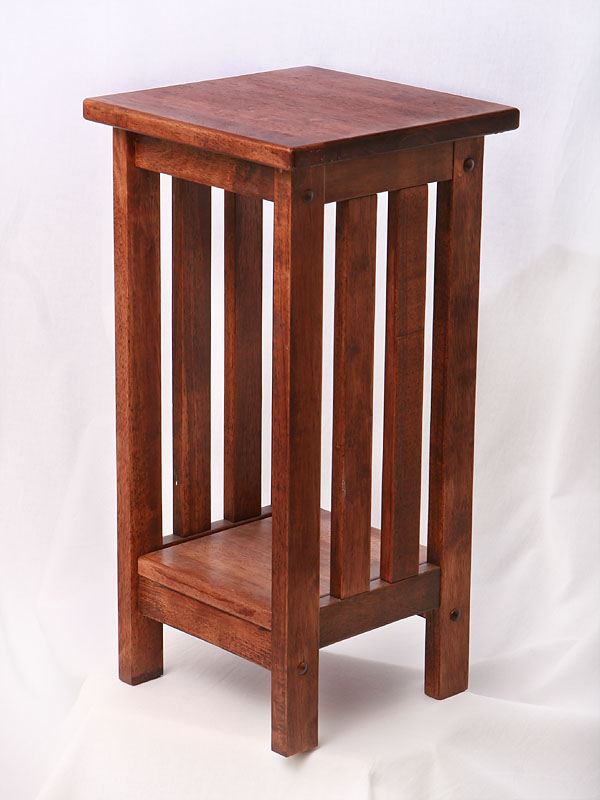
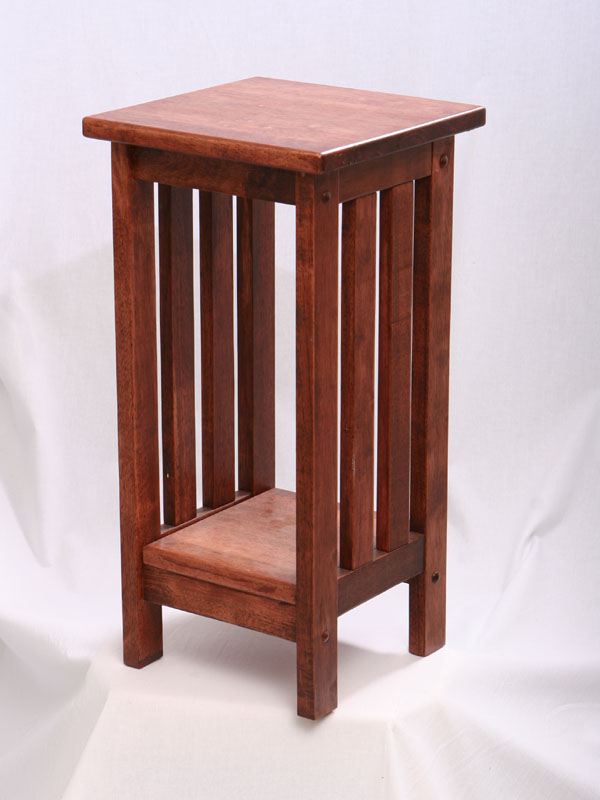
Here is a shot take with just the bare bulb flash in the front:
I routinely edit my camera results in Photoshop with adjustment layers (See my separate tutorial on the technique) and this is the shot above after editing:
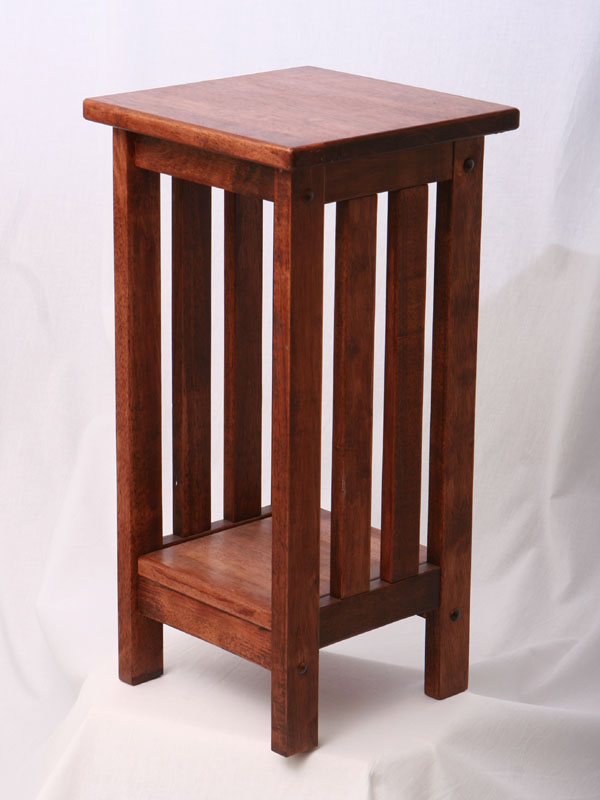
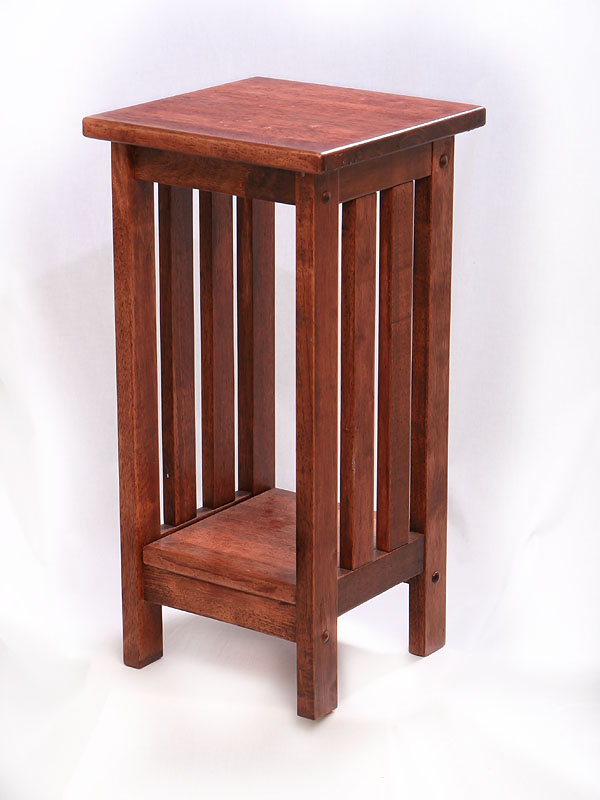
Below the accent light from behind was added to enhance the illusion of 3D by adding highlights on edges. This is the result as shot...
and after editing in Photoshop...
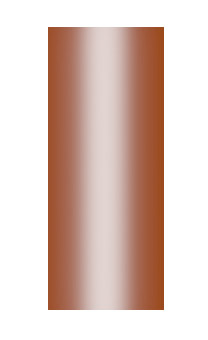
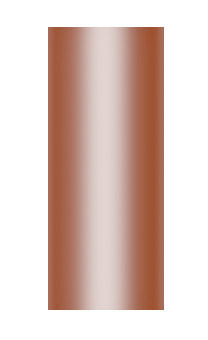
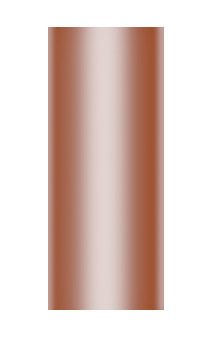
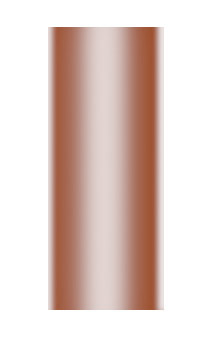
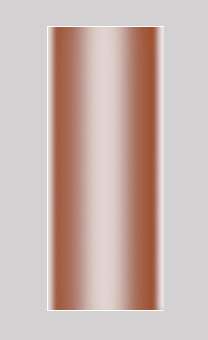
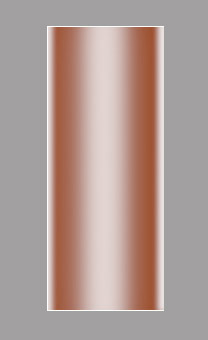
From a perceptual standpoint photographing a reflective object on a pure white (255,255,255) because the highlighted edges of the object disappear into the similar background causing a loss of definition of shape. The white background destroys the illusion of 3D created with the rim lighting. These illustrations show the effect of accent lighting on creating the illusion of 3D on a round chair leg. The first illustration shows how it would look if illuminated from the front with a single source. Then as accent lighting is added from the sides the illusion of 3D shape is enhanced, but when the accented edges starts to match the white background there is a point of diminishing returns where the rim light erodes the edge definition created by the rim light. The strongest illusion is created with a combination of the rim light and a medium-tone background.
A super white background is perceptually overpowering making it difficult to see darker detail in the object. Jet black will make the specular highlights created by the rim light distracting. A med. gray background splits the difference and provided balance with both; its just a matter of finding a good balance of "negative" space around the object. The key factor is creating a good balance of contrast between foreground and background which allows both light and dark areas in the foreground.
|
Holistic Concepts for Lighting
and Digital Photography
This tutorial is copyrighted by © Charles E. Gardner.
It may be reproduced for personal use, and referenced by link, but please to not copy and post it to your site.
You can contact me at: Chuck Gardner
For other tutorials see the Tutorial Table of Contents
|