White Point Recalibration
The Less You Measure the More You Need to Interpolate
Over the years as a photographer and photographic lab technician I've used just about every type of meter and discovered the universal axiom for metering:
The less you meter the more skilled you must be at interpolating the reading
The Original Use of Spot Reading
The we used spot meters for the Zone System was to first locate the darkest area in the scene where detail was desired in the print.
The shadow value spot reading was then used to set the exposure of the negative so that are would be recorded with a density just above the base level of the film. Because the default meter reading would render the spot as middle gray it was necessary to interpolate the exposure reading and reduce it by "X" stops to darken it to the desire darker tone. The "X" factor was determined with testing. I still have my original test prints made when learning the zone system in 1971:
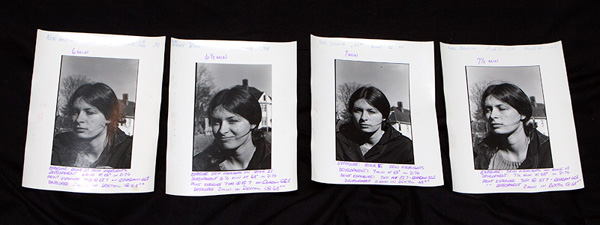
The next step when shooting was to find the brightest highlight in the scene where detail was desired and measure it. The difference in f/stops between the shadows and highlight reading would determine what development time was needed for the negative to fit it to the single grade of paper used for print. The development times where determined by shooting scenes with various ranges, as in the images above for a "normal" outdoor scene, and trying different times until an ideal match of scene to print was found. As the name implies the Zone System was a very systematic approach to photography which used very methodical analysis of scene content to control the process and make the task of making the prints in the darkroom much simpler than the practice at the time Adams introduced the system.
Spot Reading for Transparencies
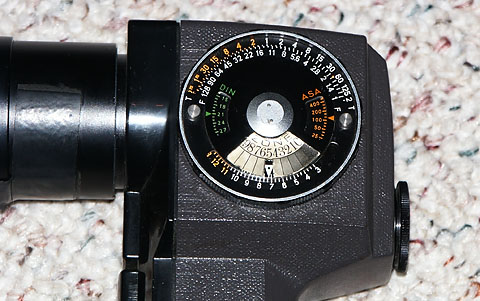
Like digital exposure for highlight detail is critical with transparency film because once lost it cannot be recovered. Transparency shooters welcomed the introduction of spot meters with 1-degree viewing angles which allowed precise measurement of highlights. But just as with the negative film it was necessary to interpolate from the "middle gray" readout of the meter to arrive at the increase in exposure necessary to render the highlights correctly.
Meter manufacturers such as Sekonic, aware of the need to interpolate, incorporated a way to do it automatically on the meter so the mental gymnastics of f/stop math could be eliminated. The exposure compensation feature in the meter changes the default reading by whatever offset value is entered. The same technique can be used for metering with digital to simplify the process.
Altering Default Tone Target with Compensation
If you have a spot meter try this simple compensation procedure which will change the exposure values shown when making a reading off a highlight to include the interpolation factor needed to change the rendering from gray to white:
- Take a white terry towel and have someone hold it next to their face. The test is best done outdoors on a clear day so the lighting is consistent over a the series of exposures required.
- Take a spot reading off the white towel. That reading will be the exposure needed to reproduce the towel as gray.
- Shoot series of exposures, starting at the indicated reading from the meter, increasing in 1/3 stop increments a bracketed series of exposures, until you see the towel black out completely in the camera playback warning.
- Download to series of files to your computer the return the CF card to the camera so both can be viewed at the same time. On the computer find the file which reproduces the fine texture of the towel most accurately and note the difference in full and fractional f/stop from the indicated meter reading. The difference is the compensation factor. Also note the appearance of the towel in the clipping warning of the same file in the camera and in the editing application.
- Using the instructions in your meter manual enter the compensation factor determined from the test into the meter.
- Go back and shoot the same subject, again metering off the white towel. This time the reading indicated by the meter will be different. Enter it on the camera and take a shot. The result should be perfectly exposed highlights.
Once calibrated that way to the highlights simply spot read any highlight you wish to retain texture. No more mental gymnastics!
Measuring Scene Range and Sensor Limit
After setting the meter to read directly off the highlights meter a cross lit outdoor scene and expose in the camera to accurately render the highlights. The read other areas and on a sketch of the scene make notes of the meter readings in various darker parts. Process the RAW file without any manipulation of the tonal range them compare your notes on exposure to the parts in the reproduction where detail is lost. That will reveal, in practical terms, what the range limit of your camera sensor is.
Once you know the range of your sensor you will be able to tell when scanning the scene with the spot meter which dark areas will lose detail in a single exposure. For example it you determine your camera can render a 7-stop range with detail you will be able to pre-visualize via the metering readings where detail will be lost. Unlike B&W negative there isn't anything which can be done in a single exposure to capture that detail, but if shooting on a tripod you'll know how much bracketing it needed.
A More Practical Approach for Digital
Precisely exposed highlight are simple with digital without spot metering with if the camera playback over-exposure warning is used. Simply adjust exposure until clipping is seen in important highlights, then back-off by 1/3 stop: perfectly exposed highlights in far less time than arriving at the same result with a anal retentive spot metering.
Once the highlights are correctly exposed the mid-tones and shadows will fall where the camera sensor range puts them. The left side of the playback histogram will show if detail is being lost. If so the only remedies are to:- bracket using a tripod;
- shoot into the shadow side of the ambient light and add flash, or;
- base exposure on correctly exposing the mid-tones and faces and let any light tones clip (i.e., the averaging approach).
My advice if you haven't purchased a spot meter yet is don't.
The money would be better spent on lenses or lighting equipment.
Holistic Concepts for Lighting
and Digital Photography
This tutorial is copyrighted by © Charles E. Gardner.
It may be reproduced for personal use, and referenced by link, but please to not copy and post it to your site.
You can contact me at: Chuck Gardner
For other tutorials see the Tutorial Table of Contents