Part Four - Digital Editing and Retouching Basics
by Chuck Gardner
|
4. Dodging and Burning:
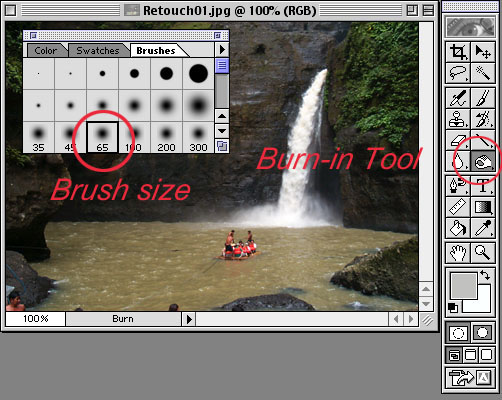
A standard darkroom technique is to selectively adjust exposure in specific areas to darken (burn-in) or lighten (dodge) the tone. The PhotoShop tools for lightening and darkening use the darkroom metaphor with a tool shaped like a hand for burn-in and one shaped like a small paddle for dodging. These tools are selected by clicking and dragging on the tool box until the desired tool is selected. 
Double clicking the tool icon will open an option box which will allow the amount (pressure) and tonal area to be adjusted to be selected. Highlights, Midtones, and Shadows can be altered separately. The final selection to make before using the burn or dodge tool is the brush size. If the brush selection window is not already open, select it using Windows - Show Brushes. Select the size brush most appropriate for the area to be modified. The area affected will be show by a circle when the cursor is moved over the image. Use the burning tool to tone down any bright areas which detract from the center of interest. If you make a mistake use Apple&Z to undo the last change, or the History window to undo the most recent. 
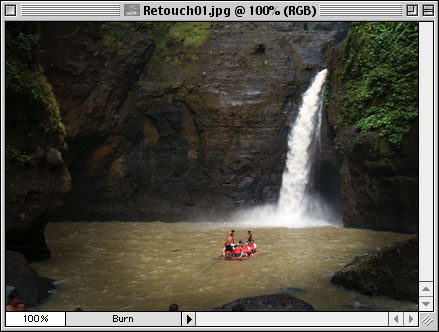
In this example I darkened the outer edges of the bottom and sides to draw the viewer's eye towards the the raft, which is the desired center of interest. Goto Next Page > Goto < Previous Page > Goto Class Outline Goto super.nova.org my home page. |